Showing posts with label flowers. Show all posts

3D Rose & Tulip Tutorial


The Rose and Tulip have a lot of similarities.   Start with the largest petal ring first and insert the tabs into the  hole on the adjacent petal forming a bowl.


This picture shows the different sets of petals for the rose.


The piece above is the stem.  Form it by rolling the rectangle part shown on the right up above.    The goal here is to form a tight roll so you may have to roll it a few times.  The long thin part to the left is kept straight.


Once rolled tightly.  Check the hole on the petals  to make sure that the stem fits into the hole.  Once rolled glue in place.


Fold the long piece along the dotted lines.

Form a tri-fold which will be the top part of the stem and hold the petals down.

Insert stem through the smallest petals.  Ensure the tri-fold is on the inside.  

Insert other petals onto the stem from smallest to largest.

Form base cone, by curling it then gluing the edge that overlaps.  Be sure to  the gap at the tip of the cone to insert the  stem.

Slide base onto the stem and press up against the petals.

Add leaves by gluing the base of the leave onto the stem.   Once attached fold down.


My computer is up and running again, so here's a sneak peak of what's to come!

So if my computer hadn't crashed at the beginning of the week, you would have seen these A LOT sooner! There are a lot of fun things coming your way. If you like 3D it just gets better! Don't worry if you haven't quite caught the love of 3D designs, I have a variety of things up my sleave too. These cute little numbers are decorating our tree right now. Why spend tons on ornaments, when you can make them yourself! We've used plain cardstock on ours, but these would be beautiful in something a bit more fancy! With out further adu (think I spelled that wrong) what we've been working on all week, the ornaments:
Also, I have some new packs of faux stitching designs too. Yes, besides lying in bed sick, taking care of sick toddlers and complaining that my blasted computer keeps crashing (anyone else have that problem with HP computers?) I have actually been trying to get something accomplished. So, again, without further adu (mayber I better look up how to spell that.) here are the faux stitches coming your way:

There are 3 different sets of the faux flourishes that you can mix and match however you like. I prefer not to use the outline on the those but wanted to provide them for you incase you wanted them.

And how about some regular cuts. To go along with the faux flower above, I have a regular cut to match it plus another fun flourished flower. Some of you may be thinking "Flowers?! It's winter!" Well all we get is rain and things are green over here, plus don't flowers just make you feel warm when there's snow all around?


Be sure to get the free GSD in the previous post and submit your photos on facebook!
Enjoy!

Stitching Template tutorial

To create a stitched design, you will need:
        * your cardstock with the stitching template cut using your Silhouette
        * a needle
        * floss or thread
I previously, cut the "stitching templates - geometric border" design from my piece of cardstock.  (stitching_templates_-_geometric_border_C00597_17986)

Step 1:
Figure out where you would like to start and push the needle from back to front.
 
Pull the thread through but keep hold of the tail.

Step 2:
Tape down or tie the end on the back so it doesn't pull through.

Step 3:
Now push the needle from front to back in the next hole. (Don't worry about any "hanging chads", they will just be pushed aside with the needle.)

Step 4:
Push the needle from back to front in the next hole.

Step 5:
Push the needle from front to back in the previous hole. (Hole you used in step 3)

Step 6:
Push needle from back to front in next empty hole.

Keep up this pattern of stitches until you have completed your stitching pattern.

And voila! You've created a little homemade touch to any card or LO!

Note: I cut my stitching template out by hand after I had stitched it. If you're planning on cutting an outline of it in the end, I'd do it before even starting to stitch. I just didn't plan ahead. Everything is much easier with the Silhoeutte than by hand, of coarse!

Oh, and check out how Starlight Scrapper's 3D tree turned out here. While browsing through her blog, I also found some other really fun creations from the Silhouette. She does some great work. Gotta love Cali's chubby series, and I love Samantha's "2 layer swirly halloween batbat " that Starlight Scrapper has used. Keep up the awsome projects. I'm loving them!

Anyways, hope the tutorial helps get you excited for the possibilities of the stitching templates! If you've overlooked them, here's the ones that are available in the store now:
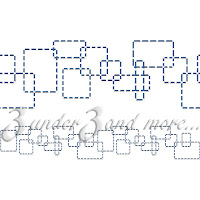


Here's the newest one. Basic straight stiches. Easy to use anywhere. I've included a variety of stitch lengths so you don't have to adjust the holes yourself. The work is done for you. To make it fit a shorter length, just ungroup and delete any holes you don't want.
Enjoy!

A charming bridge

Here's a quick post of 4 recent charm designs available and the tower bridge. Enjoy!
Related Posts with Thumbnails