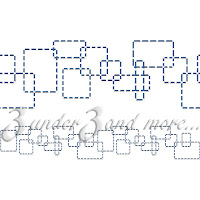
To create a stitched design, you will need:
* your cardstock with the stitching template cut using your Silhouette
* a needle
* floss or thread
I previously, cut the "stitching templates - geometric border" design from my piece of cardstock. (stitching_templates_-_geometric_border_C00597_17986)
Step 1:
Figure out where you would like to start and push the needle from back to front.
Pull the thread through but keep hold of the tail.
Step 2:
Tape down or tie the end on the back so it doesn't pull through.
Step 3:
Now push the needle from front to back in the next hole. (Don't worry about any "hanging chads", they will just be pushed aside with the needle.)
Step 4:
Push the needle from back to front in the next hole.
Step 5:
Push the needle from front to back in the previous hole. (Hole you used in step 3)
Step 6:
Push needle from back to front in next empty hole.
Keep up this pattern of stitches until you have completed your stitching pattern.
And voila! You've created a little homemade touch to any card or LO!
Oh, and check out how Starlight Scrapper's 3D tree turned out here. While browsing through her blog, I also found some other really fun creations from the Silhouette. She does some great work. Gotta love Cali's chubby series, and I love Samantha's "2 layer swirly halloween batbat " that Starlight Scrapper has used. Keep up the awsome projects. I'm loving them!
Anyways, hope the tutorial helps get you excited for the possibilities of the stitching templates! If you've overlooked them, here's the ones that are available in the store now:

Here's the newest one. Basic straight stiches. Easy to use anywhere. I've included a variety of stitch lengths so you don't have to adjust the holes yourself. The work is done for you. To make it fit a shorter length, just ungroup and delete any holes you don't want.
Enjoy!


Thank you for the straight stitching template - that's definitely going to come in handy - especially on cards!
ReplyDeleteI love, love, love the NY charms - soooo cute!!! How about doing London and Paris?
Oh, and (don't want much, do I? ;-) are you going to be making any more of the realistic farm animals? I just loved the pig and goat.
Oh, and thank you also for these tutorials. I know this takes a lot of time, but they are definitely appreciated :-)
Lauren
This stitching is very cool! Do you think there will be any Christmas designs released in the near future? I'm trying to figure out my Christmas cards this year and I would love to do something like this.
ReplyDeleteThanks! Penny
I can't believe it took me this long to realize that I hadn't made a straight stitch. That is a necessity!
ReplyDeleteLauren,
I'll try to come up with Paris charms and others cities. I like your suggestions. I've been trying to get around to making other realistic animals too. Are there any specific ones you're looking for?
Penny,
For sure will have some Christmas Designs for you! I'm working on a few snowflakes, but is there anything specific you would like for your Christmas cards? I'll see what I can do for you!
Always glad to have your comments and suggestions! These are the first tutorials I've done, so I hope you are all able to follow them okay. Thanks again!
Hi Kenzie! Thanks so much - I'll look forward to seeing the Paris charms - maybe something like the Eiffel tower, L'Arc de Triomphe, a Metro sign, a poodle? For London, things like Big Ben, a black taxi, double decker bus?
ReplyDeleteFor animals, I would dearly love one of those black/white dairy cows (holsteins.) I would also love a buffalo (I know they're not really farm animals (well, in most places, anyway!) but our petting zoo has one.) I've even already got the brown flock for the fuzzy bits, but alas, no buffalo...
And can I chime in on the Christmas stitching? How about something with holly leaves (which would be cool using beads or bling for the berries), or a stitched flourish incorporating snowflakes (which I'd love to do in some of that white sparkly thread)?
Thanks again Kenzie - I so look forward to what new designs you come up with :-)
Lauren
You have great ideas, Lauren. I've seen Holstein cow pop up on the requests on Silhouette quite a bit lately. I'll see if I can fit that in too!
ReplyDeleteHey, I am trying to help some ladies out with their Relief Society. They need temple designs. They are desperate for Manti, Oquirrh Mtn, Timp, Logan, Id. Falls, Cardston, St. George and Seattle. I sell for Silhouette, and promised to help them when someone backed out on them. Please submit any of those requested to silhouette if possible!Thanks so much!
ReplyDeleteI just downloaded the new snowflake stitching patterns too - OMG those are totally AWESOME!! My family is gonna LOOOOVe their cards this Christmas!! ;)
ReplyDeleteAnd thank you for the kind words on my work, **blush**. It's so easy to create fun things when I have such awesome designs from all you Silhouette gals!