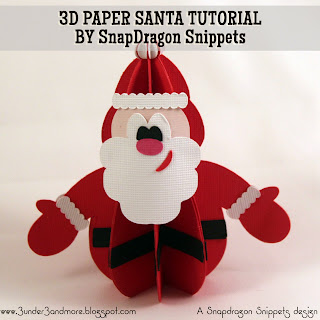
Let the fun begin!
Here is a perky holiday decoration using
one of the easiest 3D styles: slice form.
Step 1. Identify the cut shapes.
A-D are body front pieces
E (4) are body back pieces
F (8) belt accents
G (8) hat tassel ball accents
H (4) mitten fur trim accents
I hat front fur accent
J head K beard with eye whites L eye pupils
M nose N mouth
Step 2. Assemble Santa's face as shown.
Beard overlaps head shape, with hat fur attached near the top of head.
Position and glue eyes, then nose below, then offset, angled mouth.
This image shows head assembly from the backside
(reversed with top in the downward position here).
You can see how the beard is overlapping the head shape.
Step 3. Glue a belt accent piece onto the
front of each body piece (A-E).
Take care that the belts are all at the same height
so they will align from one slice to the next.
Here are all the body pieces with the belts in place.
Step 4. Fold all body pieces at center perforations.
Complete body back half by gluing 4 body sections together,
aligning and attaching half of one body shape
with the adjacent halt of the next body shape.
Complete body front half by arranging A-D shapes in sequence,
then joining in order (left to right) as for back body half.
Join front and back halves to complete body.
Here you can see the assembled body from the front.
The tiny tabs on B & C extend outward so that
the assembled head can be attached there (see Step 7).
Step 6. Fold, then glue each of the tassel "circles" in place
at the top of each body piece.
Step 7. Center and attach face onto figure front,
using tiny tabs as a glue-attaching surface.
You can see in this backshot where the tab
is glued behind the top scallop edge of the beard.
(Both sides will be the same.)
Step 8. Glue mitten fur accents in place.
Now, how will you include this fun dimensional design in
your Christmas decorating or festivities.
We would love to see your pictures on Facebook, Flickr or Pinterest!


he's so cute! I can't wait to make a few for gift toppers!!
ReplyDelete