Showing posts with label halloween. Show all posts

Witch Fancy Shoe Shaped Large Card

Hi Shary here again and today I'd love to show you a project I made for a  Halloween card or invitation.


I've used file #77 , witch fancy shoe shaped large card. 
http://www.snapdragonsnippets.com/store/product/86

It's a great way to jazz up a Halloween card or invitation to a party. The file is super easy and fun to dress up. I've used some bright Halloween colours including some lovely purple glitter embossing powder. The black lace and green twine add a special touch too.

I think your friends would be very impressed if you sent these out!!

Shary
x

Tutorial: Bat Easel Card

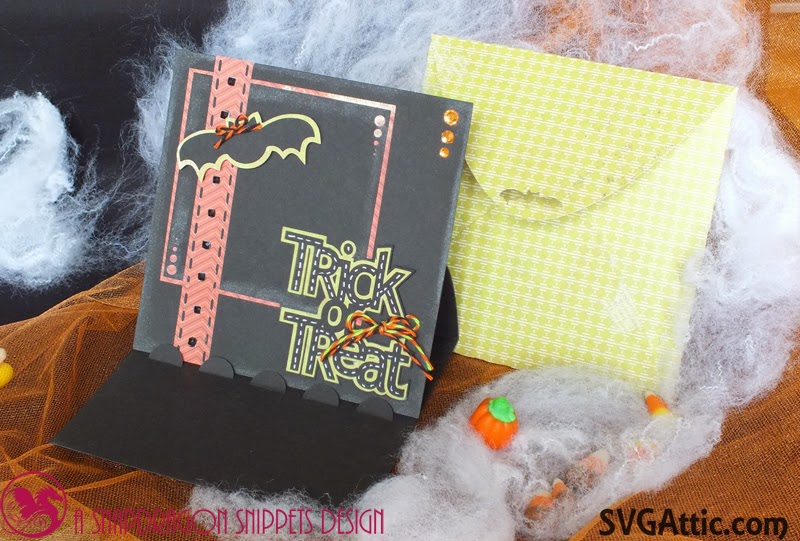
This is a tutorial for the bat easel card that is part of the Halloween Soiree kit at SVG Attic.  The picture above also shows the coordinating envelope that will be in that kit.  The card is also available in the Silhouette Store. 

Here is a view of the different pieces that are included with the easel card.  I cut the base, card front, upper decorative square, upper bat and upper Trick or Treat pieces out of black cardstock.  The faux ribbon and background decorative square are shown in a orange print cardstock and the shadow bat and Trick or Treat pieces are cut from patterned green cardstock.

Start with the base piece and fold both of the score lines towards you.

Bend the cardstock at the inner score line so it creates a 5" square.

Add tape runner to the area just below the score line visible on the front.

Place the 5" square card front on top of the base, lining up all sides.

Open the card up and bend up the scalloped tabs that are cut in the base.

Place the card front behind the scallops.  This is how the base of the card should look.  Set the base aside for now to start on the decorative layers.

Layer the black decorative square on top of the orange square with tape runner.

Next layer to add is the green Trick or Treat shadow piece.

Then add the black Trick or Treat layer.

Now bring back the card base that is folded and adhere the decorative layers to the front.

Using liquid adhesive attach the faux ribbon piece towards the left side of the card front.

Next, layer the black bat layer on top of the green shadow.

I added foam squares to the back of the bat, for extra dimension, but you could also use liquid adhesive.

Add the bat to the top left corner of the card.

Add whatever embellishments you want and your bat easel card is finished!

Here is a close up of the embellishments that I added to the card front.

I hope you have a wonderfully crafty day!
Beth
Beth's Beauties

Tutorial: BOO! Boxes

This is a tutorial for the BOO! boxes that are part of the Halloween Soiree kit at SVG Attic.  They are also available in the Silhouette store at these numbers:  32809, 32808, 32807, 32806.  The tutorial below is for the second "O" which is #32807.

These are the box pieces.  I cut them out of patterned cardstock.  These are the pieces you receive if you purchase the boxes through the Silhouette store.  There is an accent letter piece that is included in the SVG Attic version of these boxes, but it is not pictured above.  I cut the accent letter piece out of black glitter paper.  Tip:  The black glitter cardstock I used was from DCWV's Glitzy Glitter 12x12 paper stack.  It cut perfectly with my Cameo and the glitter didn't flake off.

First bend all of the perforated score lines away from you.

Next add liquid adhesive on the bottom flap of the box front.

Adhere it to the other box piece at the end without the curve cut out.

Apply liquid adhesive to the flaps on the first side, one flap at a time.

Press each flap firmly against the side of the box.

Continue with the second flap

and adhere this is what the first side looks like when adhered together.

Flip the box over to the opposite side and add liquid adhesive to both of the flaps.

Press the box side onto the flaps lining up the edges.

This is a side view of what your box should look like now.  Make sure the side flaps of the box are bent inward

and close the lid.  This is what the side/rear view of the box will look like.

This is the front view with a battery operated tea light inside.

Finally add the decorative letter piece to the front lining it up with the letter on the box base.

Here is a look at all four of the completed BOO! boxes.

I hope you have a wonderfully crafty day!
Beth
Beth's Beauties

Tutorial: Doorhanger Spider Web Box

This is a tutorial for the doorhanger spider web box that is part of the Halloween Soiree kit at SVG Attic.  This box is also available in the Silhouette Store.

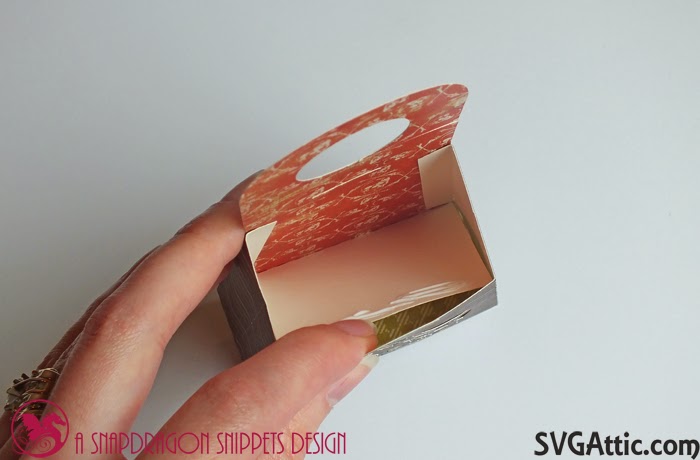
Here are the pieces you will have cut out.  I chose to use patterned cardstock for mine.  The black is the actual box, the green is the lining and the orange is the back.  There is also white and black spiders that I cut out of solid cardstock.  The pattern also includes another back piece that does not have the slit in the right side.  You only need one of the back pieces for this box.

Start with the box piece and bend the bottom flaps inward.

Fold the left side perforations in a mountain, valley, mountain fashion as seen above.

Repeat on the right side.

Take the back piece and fold up the bottom on the score line.

Add liquid adhesive to the flap.

Attach that flap to the inside bottom flap of the box, matching the edge of the box flap with the score line on the back piece.

Add liquid adhesive to the bottom and side flaps of the box.

Adhere them to the inside of the box along the bottom and back.

Apply glue to the tabs on the other side

and adhere them in the same fashion as the first side.

Now take the lining piece and fold the bottom flap upward.

To fit it in the box, you will need to hold the bottom flap up and curve the paper while inserting it diagonally.

Lower the insert into place.

Apply liquid adhesive to the back of the top edge of the insert

and press it to the back making sure that the lining is just below the slit in the back.

Then press the bottom of the insert into place in the base of the box.

Next, add the white spider on the black part of the box

and the black spider on the orange part.

To close the box, pinch each side

and insert the tab at the top front of the box into the slit in the back.

There is the finished project!

Here is a close up of the box part.

Feel free to embellish it and fill it with treats!

I hope you have a wonderfully crafty day!
Beth
Related Posts with Thumbnails