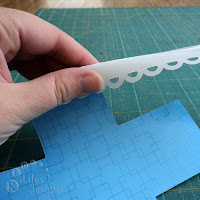
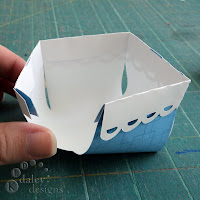
First of, cut your basket out with your Silhouette. I suggest a lightweight to mediumweight double sided cardstock with different patterns or colors on each side. (If you're new to my blog and don't know about the Silhouette, go to http://www.silhouetteamerica.com/.) There should be a total of two pieces that you'll need, the body of the basket and the handle.
1. Start off by folding over the basket rim. If you lay your basket body on the table as I have in the video, then the pattern that is face-up will be the main basket, and the pattern face-down, will be your rim.

2. While rim is folded over, fold at perpendicular perforated lines towards the inside of the basket.
3. Unfold and open the basket rim. We're now going to put adhesive on the inside of the rim so that once assembled, it will stay together. I just use a double stick adhisive tape runner for mine.
*add your adhesive to the areas shown circled in PINK. Be sure NOT to put adhesive in the areas circled in YELLOW. If you add adhesive to the areas circled in yellow, it will be difficult to add your baskets handle.
4. there are two section of the rim, a short section and long section. Start off with the short section. Take the corresponding base section and line the top edge with the fold going down the center of the rim as shown:
10. Repeat step #9 with the other end of the handle and voila, you're finished.
Don't just use for Easter though, it's great for baby showers, bridal showers, holiday gifts, birthday favors. The list goes on!


No comments:
Post a Comment